
Stable Diffusionのtxt2img.pyで利用できるコマンドライン引数を調査しました。
ただ、調査と言っても不明な部分が多く、自分用のメモとしての記録が目的です。
◆ Stable Diffusionのインストール方法について
Stable Diffusion凄いですよね。登場時に内容を見て震えました。ここでは勉強のため、純正のStable DiffusionをWSLとUbuntuの環境に構築したいと思います。実用するなら別記事で紹介するStable Diffusion web UIを使ったほうが絶対に便利ですよ。◆ Stable Diffusion web UIのインストール方法について[20240303]環境構築後にCUDA ToolkitやcuDNNを更新する方法です。本記事のバー...
事前作業
Anaconda仮想環境の有効化
僕の場合は仮想環境を有効化する必要があるので、これを毎回実行します。
conda activate ldm
cd ~/stablediffusion/
Stable Diffusion関連
-h, --help (show this help message and exit)
普通のヘルプ表示です。利用できるコマンドの一覧が見れます。
python scripts/txt2img.py -h
実行結果はこんな感じです。
usage: txt2img.py [-h] [--prompt [PROMPT]] [--outdir [OUTDIR]] [--steps STEPS] [--plms] [--dpm] [--fixed_code]
                  [--ddim_eta DDIM_ETA] [--n_iter N_ITER] [--H H] [--W W] [--C C] [--f F] [--n_samples N_SAMPLES]
                  [--n_rows N_ROWS] [--scale SCALE] [--from-file FROM_FILE] [--config CONFIG] [--ckpt CKPT]
                  [--seed SEED] [--precision {full,autocast}] [--repeat REPEAT]

optional arguments:
  -h, --help            show this help message and exit
  --prompt [PROMPT]     the prompt to render
  --outdir [OUTDIR]     dir to write results to
  --steps STEPS         number of ddim sampling steps
  --plms                use plms sampling
  --dpm                 use DPM (2) sampler
  --fixed_code          if enabled, uses the same starting code across all samples
  --ddim_eta DDIM_ETA   ddim eta (eta=0.0 corresponds to deterministic sampling
  --n_iter N_ITER       sample this often
  --H H                 image height, in pixel space
  --W W                 image width, in pixel space
  --C C                 latent channels
  --f F                 downsampling factor, most often 8 or 16
  --n_samples N_SAMPLES
                        how many samples to produce for each given prompt. A.k.a batch size
  --n_rows N_ROWS       rows in the grid (default: n_samples)
  --scale SCALE         unconditional guidance scale: eps = eps(x, empty) + scale * (eps(x, cond) - eps(x, empty))
  --from-file FROM_FILE
                        if specified, load prompts from this file, separated by newlines
  --config CONFIG       path to config which constructs model
  --ckpt CKPT           path to checkpoint of model
  --seed SEED           the seed (for reproducible sampling)
  --precision {full,autocast}
                        evaluate at this precision
  --repeat REPEAT       repeat each prompt in file this often
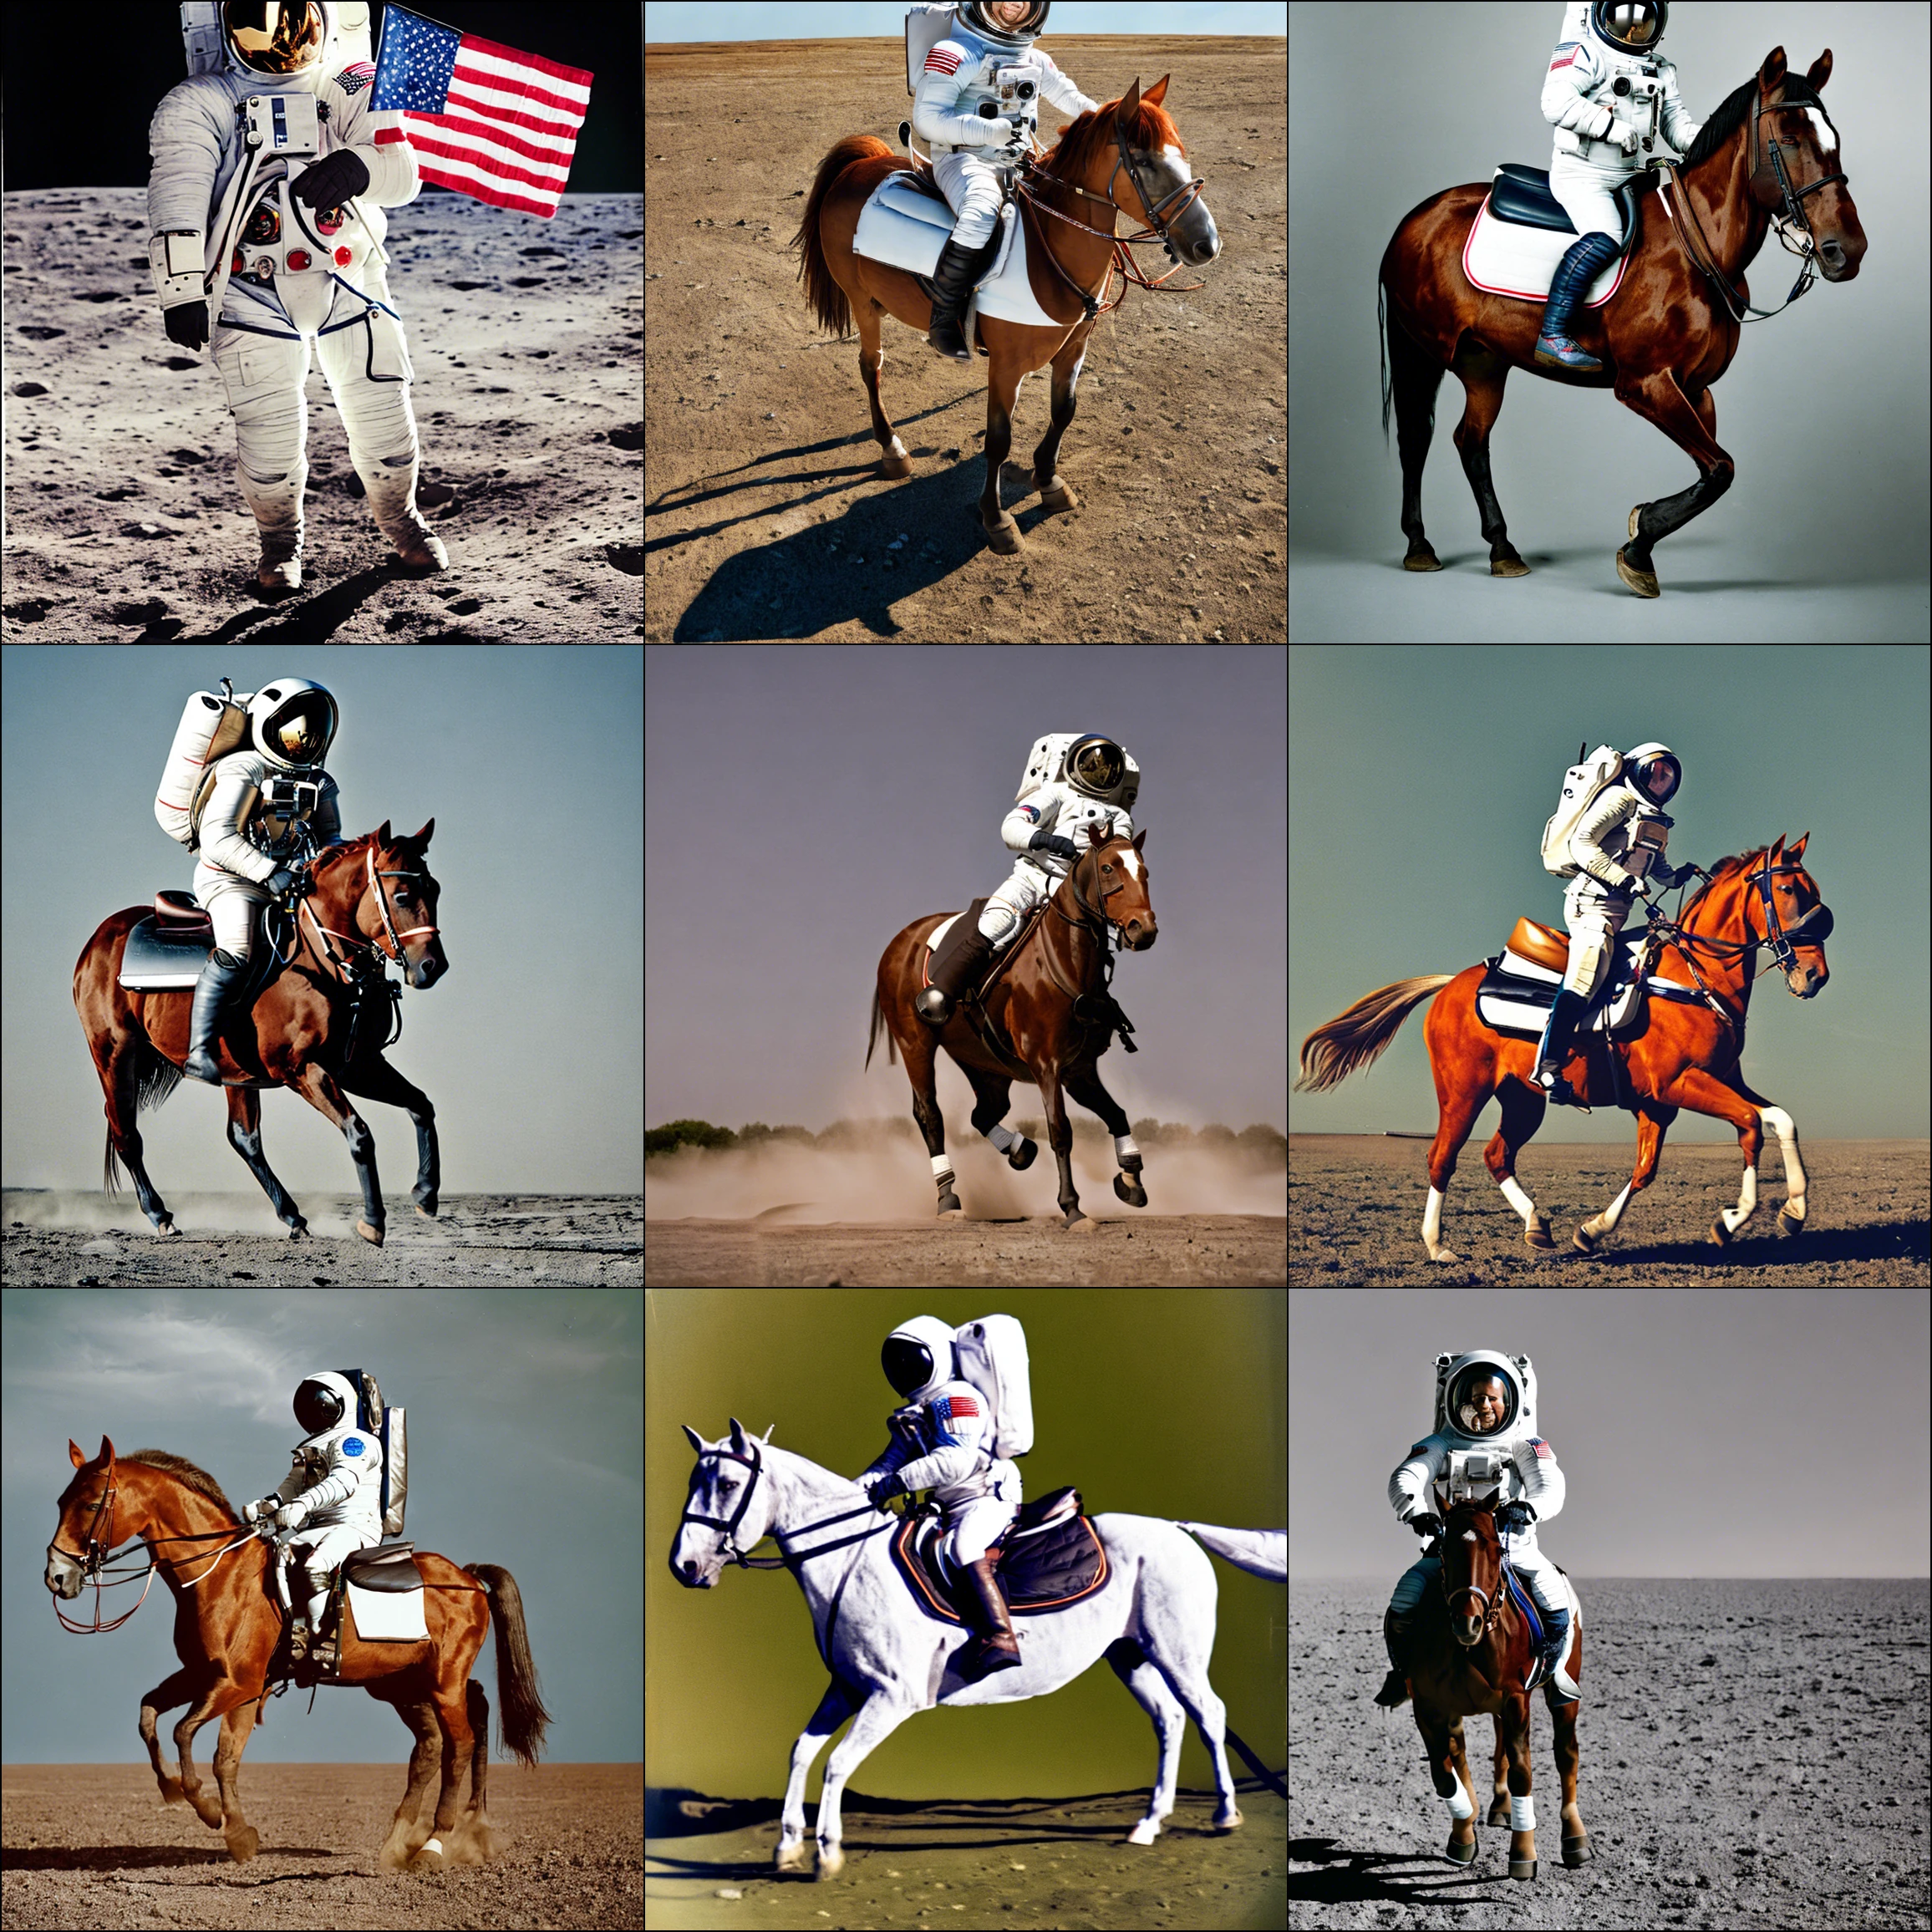
--prompt ([PROMPT] the prompt to render)
生成したい画像を英語の文章で指定します。1番大切な部分で奥が深い。今回は公式のサンプルを適当に弄って色々と試します。
python scripts/txt2img.py --prompt "a professional photograph of an astronaut riding a horse" --ckpt ./stable-diffusion-2-1/v2-1_768-ema-pruned.ckpt --config configs/stable-diffusion/v2-inference-v.yaml --H 768 --W 768
![--prompt ([PROMPT] the prompt to render) コマンド](https://takemi.blog/wp-content/uploads/2023/09/748DBFBC5AB04FC6A8765C12E5CD5DFB_77F3A4E1663E407D876A4BFC8344FDC6.webp)
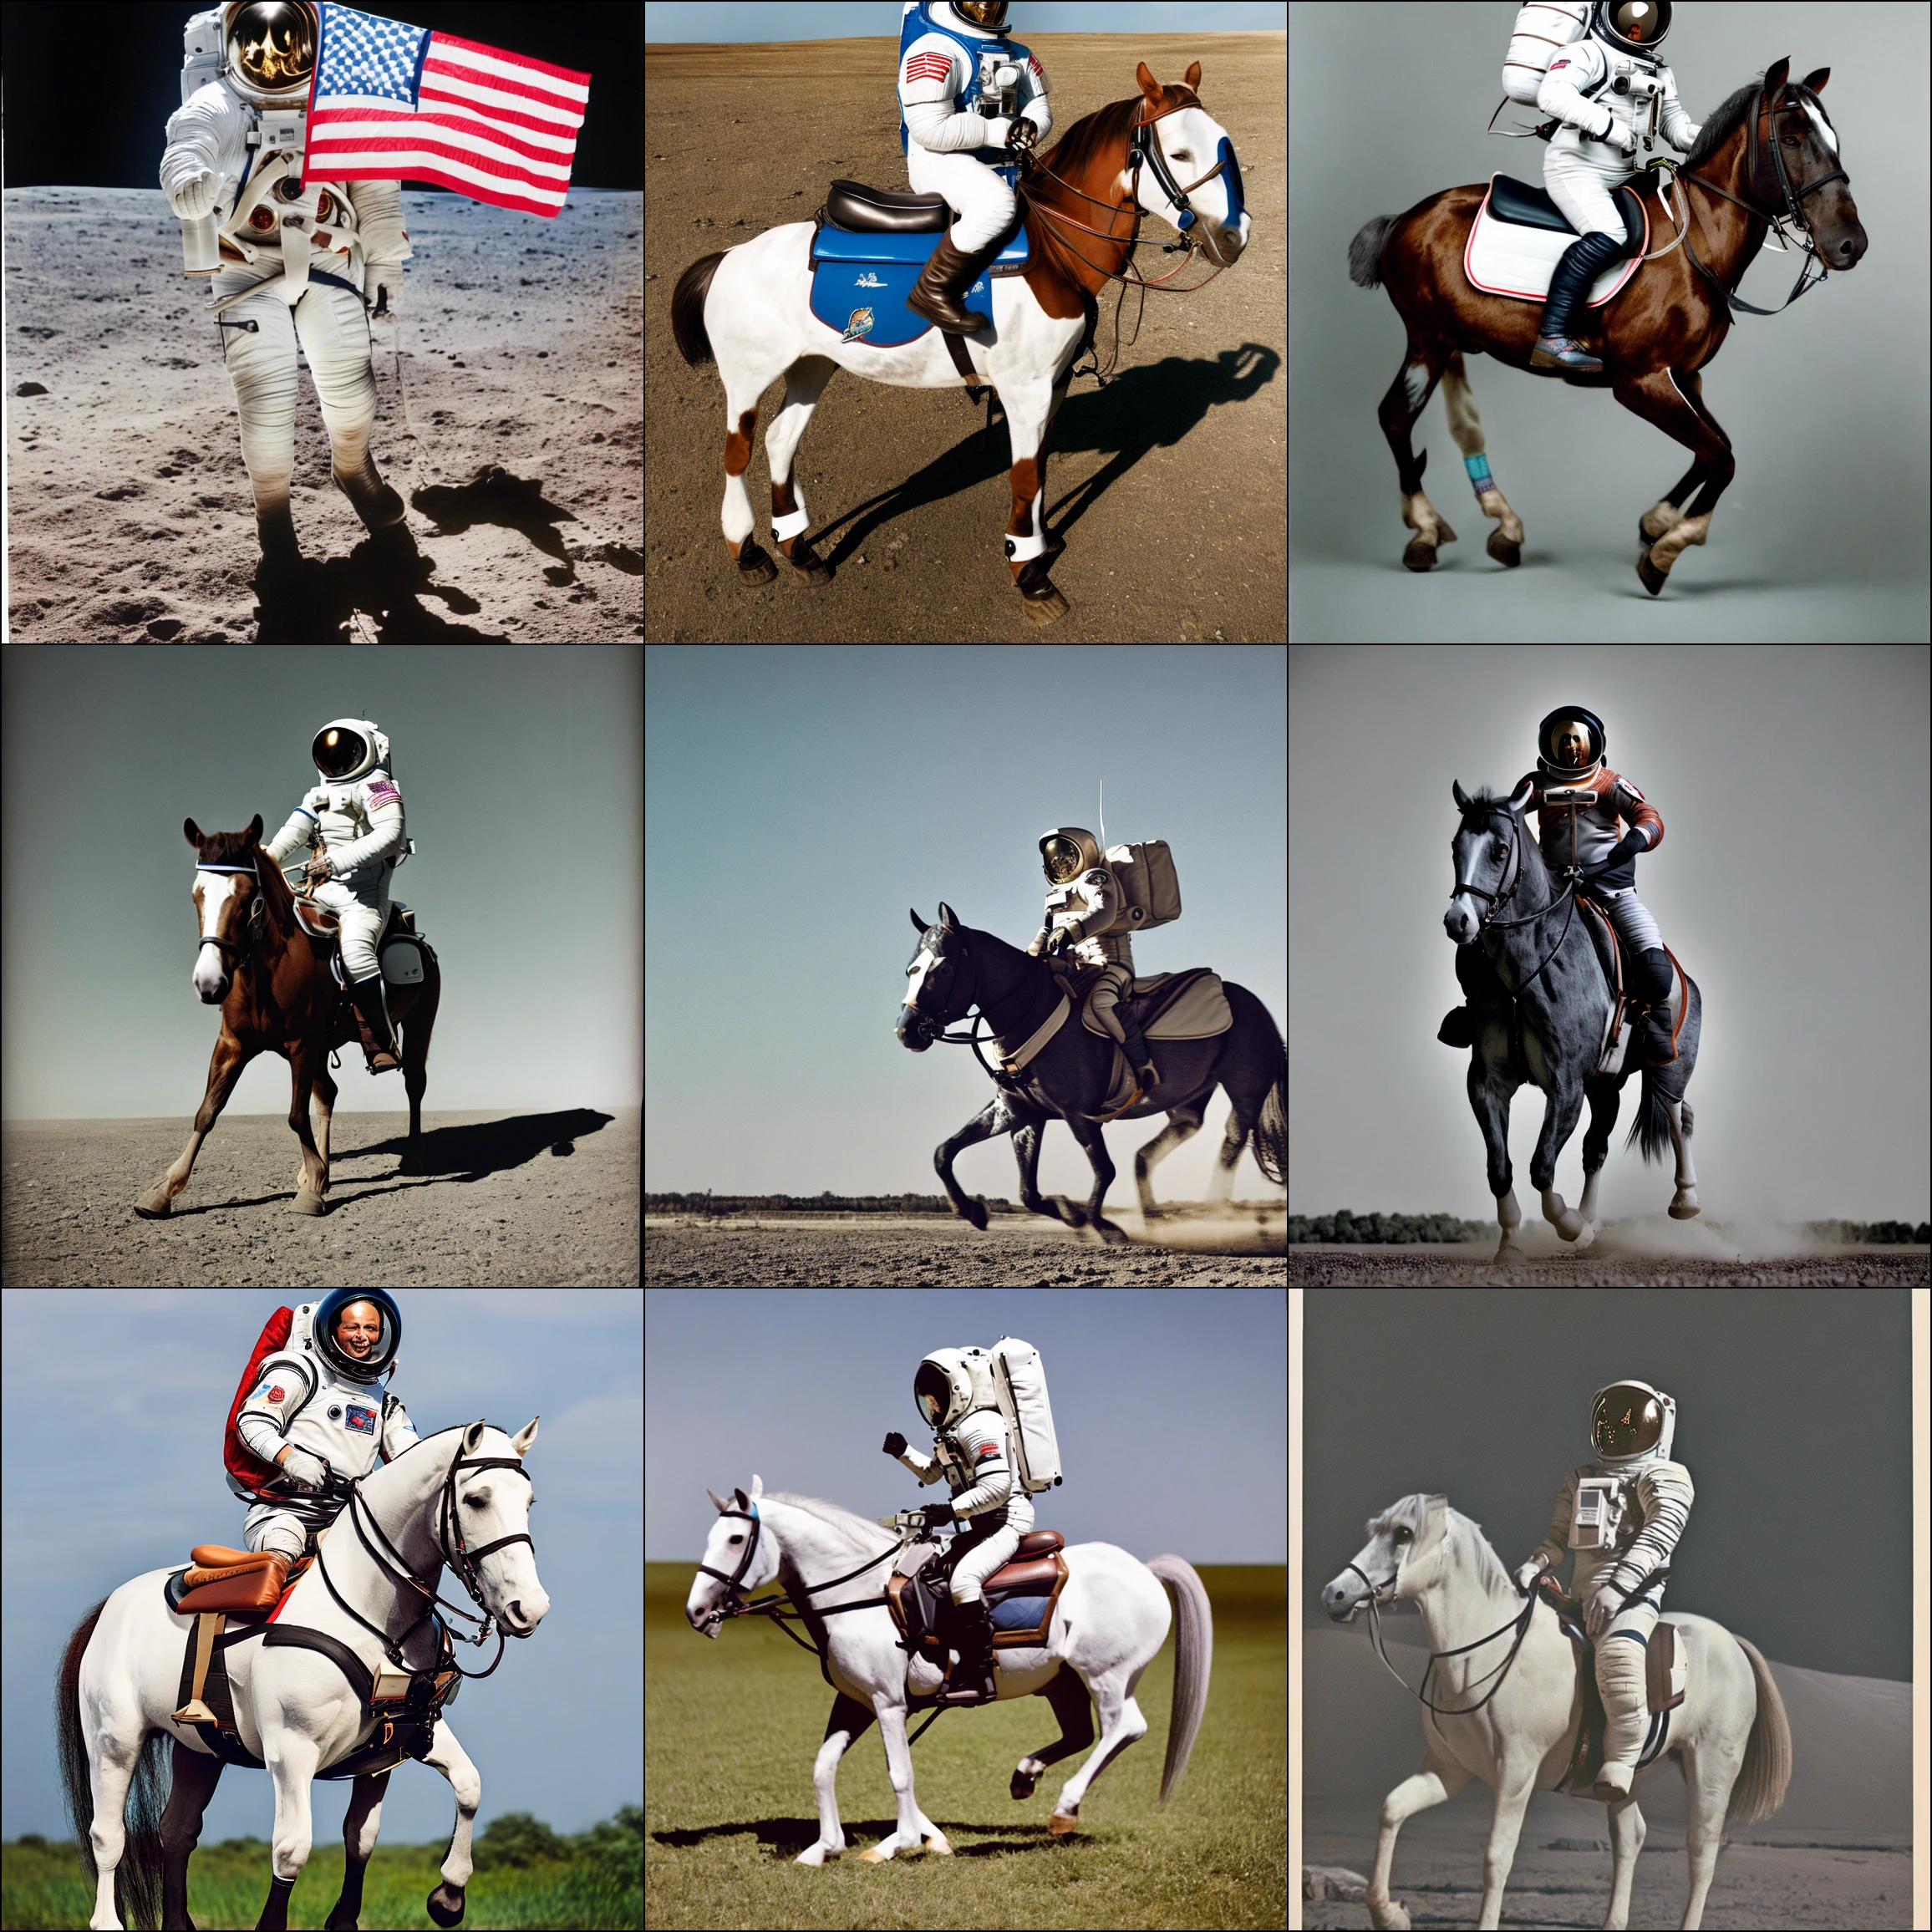
--steps ([STEPS] number of ddim sampling steps)
画像生成時のサンプリング回数を指定します。Defaultは50で大きな値は処理時間が増える代わりに精密な画像になります。
python scripts/txt2img.py --prompt "a professional photograph of an astronaut riding a horse" --ckpt ./stable-diffusion-2-1/v2-1_768-ema-pruned.ckpt --config configs/stable-diffusion/v2-inference-v.yaml --H 768 --W 768 --steps 10
![--steps ([STEPS] number of ddim sampling steps) コマンド](https://takemi.blog/wp-content/uploads/2023/09/748DBFBC5AB04FC6A8765C12E5CD5DFB_BAD1ED68B1714799A60044A439CD6A26.webp)
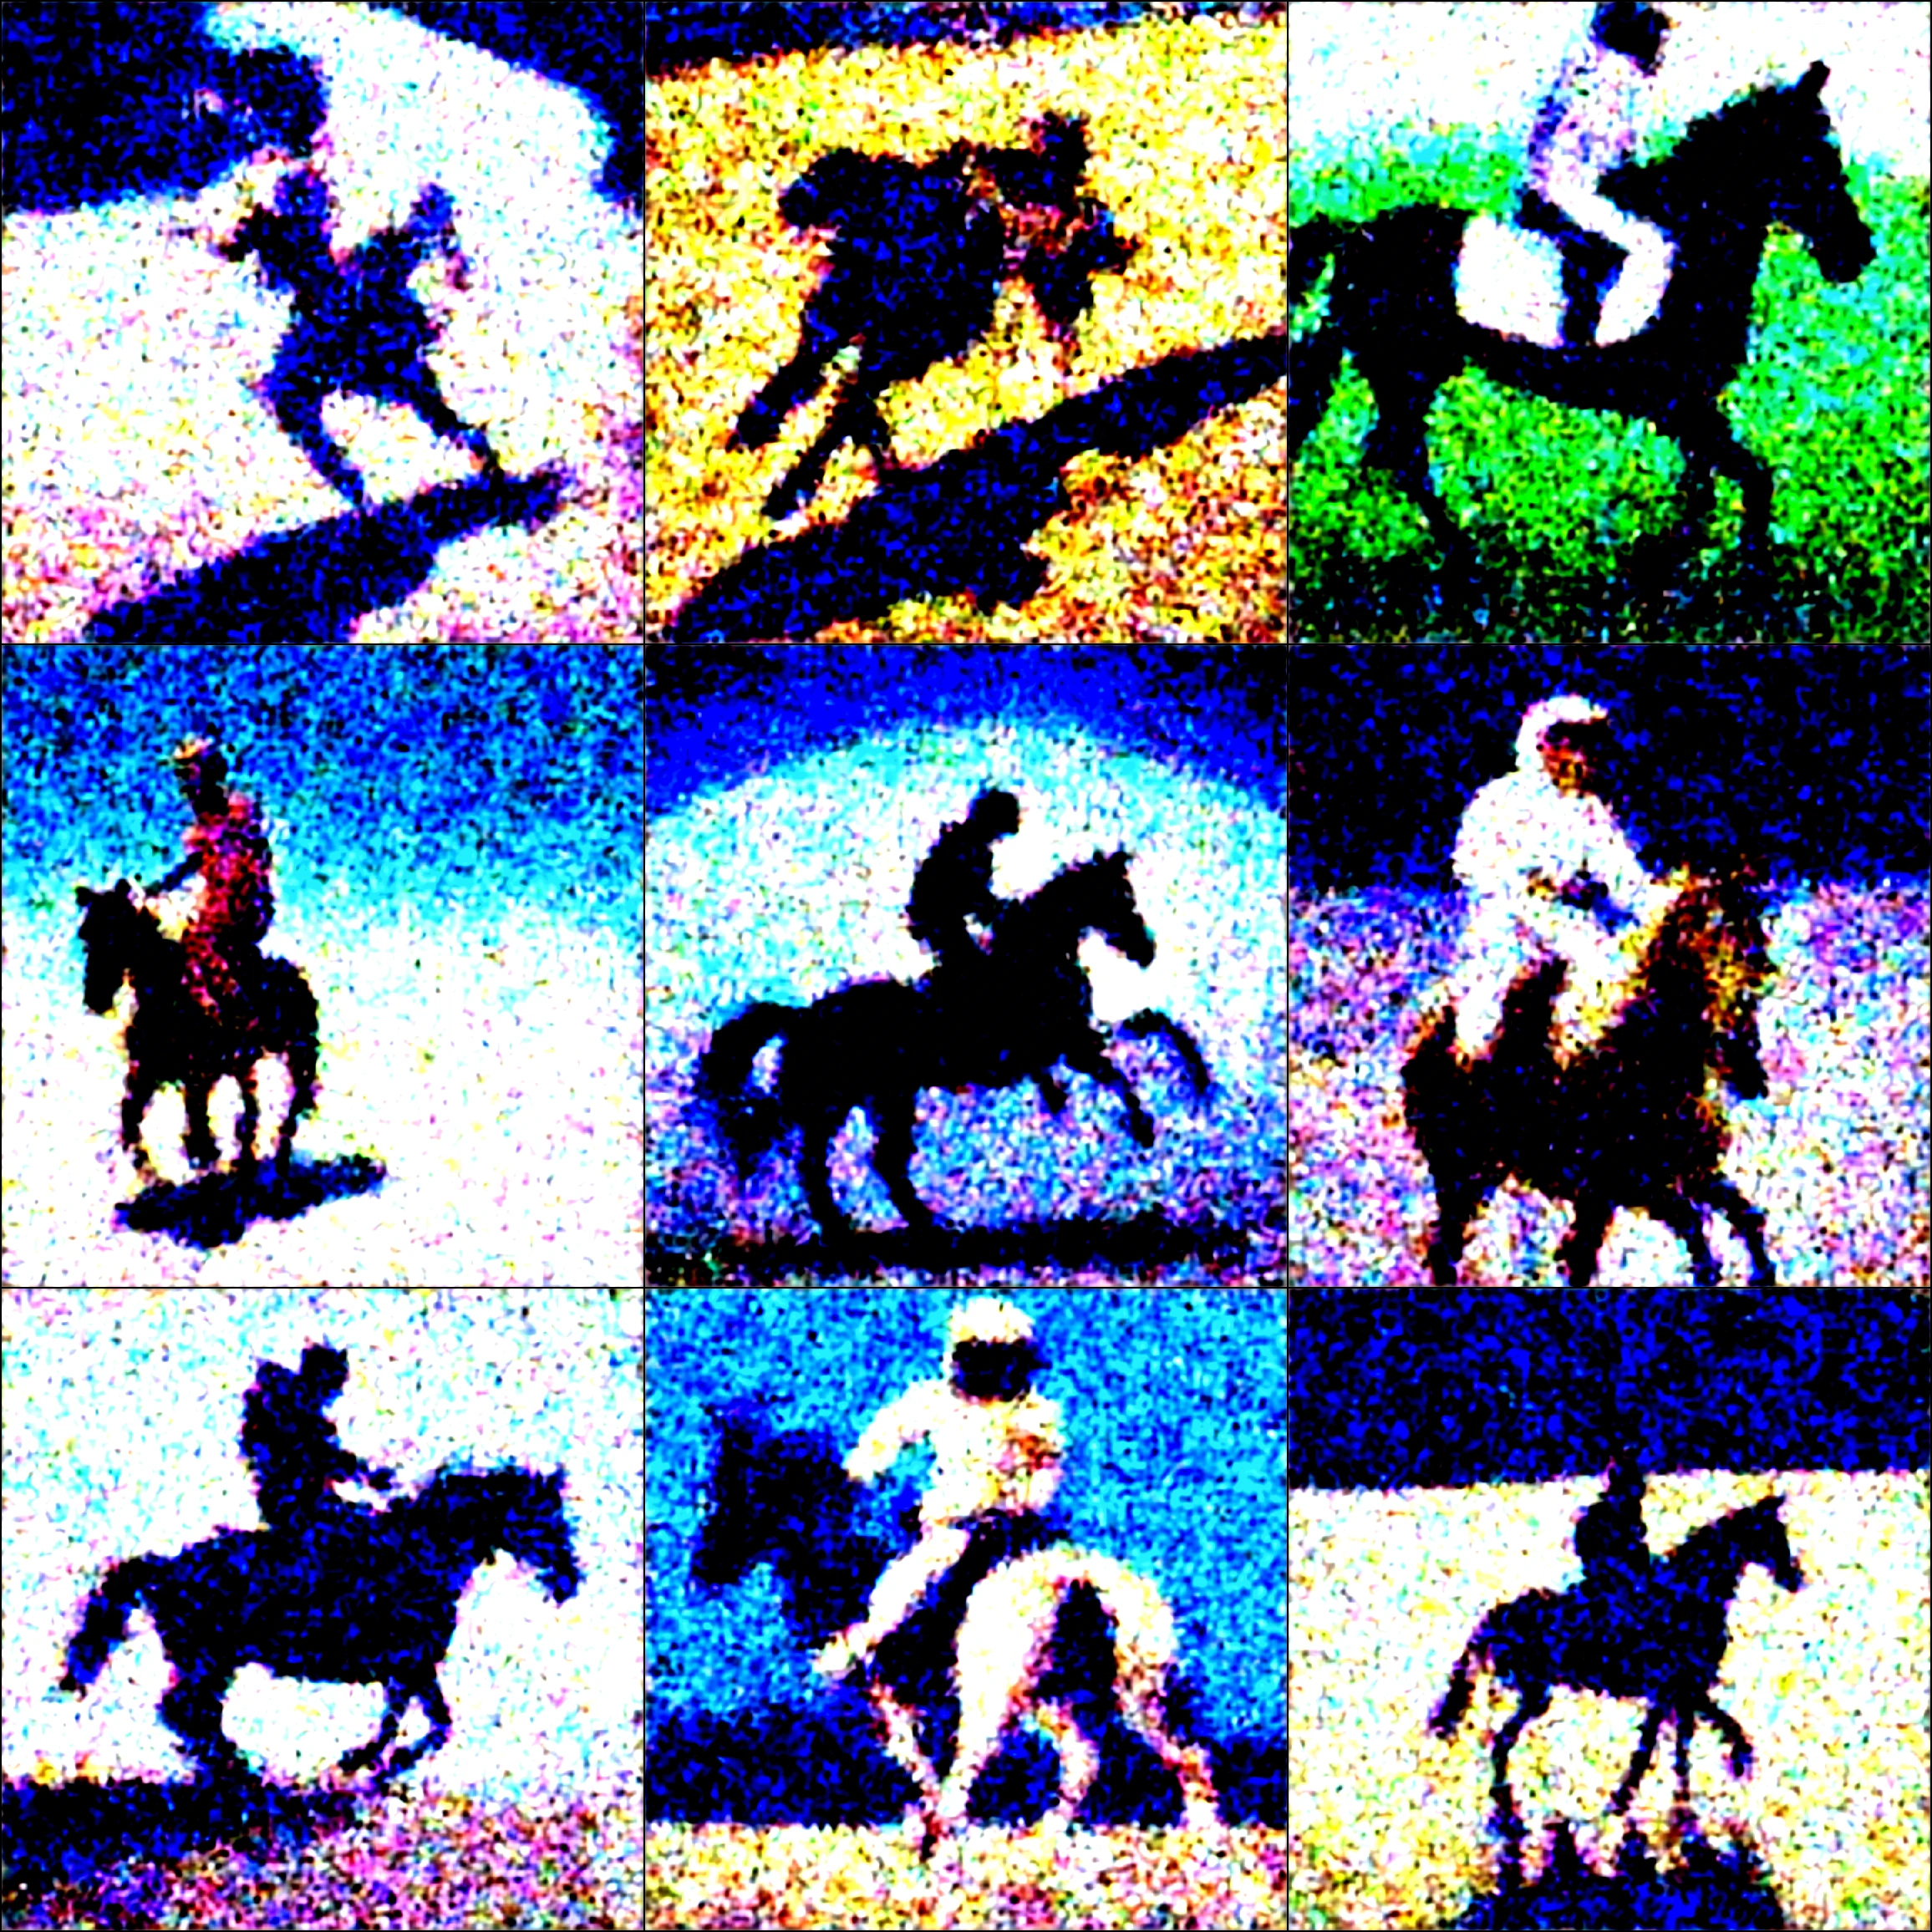
--plms (use plms sampling)
PLMSでサンプリングする場合に指定する。ただ、意味不明な画像になって困惑してる。

たぶん、どういう技法で最終的な画像を生成するのか(適当)。
python scripts/txt2img.py --prompt "a professional photograph of an astronaut riding a horse" --ckpt ./stable-diffusion-2-1/v2-1_768-ema-pruned.ckpt --config configs/stable-diffusion/v2-inference-v.yaml --H 768 --W 768 --plms
--dpm (use DPM (2) sampler)
DPMでサンプリングする場合に指定する。
python scripts/txt2img.py --prompt "a professional photograph of an astronaut riding a horse" --ckpt ./stable-diffusion-2-1/v2-1_768-ema-pruned.ckpt --config configs/stable-diffusion/v2-inference-v.yaml --H 768 --W 768 --dpm
--fixed_code (if enabled, uses the same starting code across all samples)
何も分からない。
python scripts/txt2img.py --prompt "a professional photograph of an astronaut riding a horse" --ckpt ./stable-diffusion-2-1/v2-1_768-ema-pruned.ckpt --config configs/stable-diffusion/v2-inference-v.yaml --H 768 --W 768 --fixed_code
日本語に翻訳すると「有効にすると、すべてのサンプルで同じ開始コードを使用します」で、実行結果も同じ種類の画像が3つ出現してる。
そう考えると画像生成にランダム的な要素を利用せず、同じサンプリングから最終結果を得るとか?

--ddim_eta ([DDIM_ETA] ddim eta (eta=0.0 corresponds to deterministic sampling)
これも何を言ってるのか分からない。たぶん、DDIMでetaってパラメータが使われるから、その値を指定できるやつ。
python scripts/txt2img.py --prompt "a professional photograph of an astronaut riding a horse" --ckpt ./stable-diffusion-2-1/v2-1_768-ema-pruned.ckpt --config configs/stable-diffusion/v2-inference-v.yaml --H 768 --W 768 --ddim_eta 1.0
![--ddim_eta ([DDIM_ETA] ddim eta (eta=0.0 corresponds to deterministic sampling) コマンド](https://takemi.blog/wp-content/uploads/2023/09/748DBFBC5AB04FC6A8765C12E5CD5DFB_F428F44A3A3945E482C51C57137012E6.webp)
--outdir ([OUTDIR] dir to write results to)
画像の出力ディレクトリを指定する。
--n_iter ([N_ITER] sample this often)
縦方向の画像数を指定する。
python scripts/txt2img.py --prompt "a professional photograph of an astronaut riding a horse" --ckpt ./stable-diffusion-2-1/v2-1_768-ema-pruned.ckpt --config configs/stable-diffusion/v2-inference-v.yaml --H 768 --W 768 --n_iter 4
たぶん、次のコマンドが実行するループ数が増える。
Running DDIM Sampling with 50 timesteps
DDIM Sampler: 100%|█████████████████████████████████████████████████████████████████████| 50/50 [00:25<00:00,  2.00it/s]
data: 100%|███████████████████████████████████████████████████████████████████████████████| 1/1 [00:26<00:00, 26.80s/it]
Sampling: 100%|███████████████████████████████████████████████████████████████████████████| 3/3 [01:25<00:00, 28.40s/it]
![--n_iter ([N_ITER] sample this often) コマンド](https://takemi.blog/wp-content/uploads/2023/09/748DBFBC5AB04FC6A8765C12E5CD5DFB_05623C4C107241DE83B5AE8FC1682F12.webp)
--H H (image height, in pixel space)
生成する画像の高さ。256以上で64の倍数のみ設定できる。あまりに大きいと必要メモリと処理時間が増加する。現実的には768くらいが限界かな。
256, 320, 384, 448, 512, 576, 640, 704, 768, 832, 896, 960, 1024, 1088, 1152, 1216, 1280
--W W (image width, in pixel space)
生成する画像の幅。こちらも64の倍数のみ設定できる。
--C C (latent channels)
不明。何かのチャンネル数を指定できると思ったけど、1, 8, 256, 512, 1024あたりは全部エラーだった。
--f F (downsampling factor, most often 8 or 16)
ダウンサンプリングの指定らしい。これも違いが分からない。
python scripts/txt2img.py --prompt "a professional photograph of an astronaut riding a horse" --ckpt ./stable-diffusion-2-1/v2-1_768-ema-pruned.ckpt --config configs/stable-diffusion/v2-inference-v.yaml --H 768 --W 768 --f 8

--n_samples ([N_SAMPLES] how many samples to produce for each given prompt. A.k.a batch size)
画像の横方向の生成数を指定する。つまり、実際に生成される数は前述した--n_iterと--n_samplesを掛け算した枚数になる。
python scripts/txt2img.py --prompt "a professional photograph of an astronaut riding a horse" --ckpt ./stable-diffusion-2-1/v2-1_768-ema-pruned.ckpt --config configs/stable-diffusion/v2-inference-v.yaml --H 768 --W 768 --n_samples 5
![--n_samples ([N_SAMPLES] how many samples to produce for each given prompt. A.k.a batch size) コマンド](https://takemi.blog/wp-content/uploads/2023/09/748DBFBC5AB04FC6A8765C12E5CD5DFB_7ABC774BA1EA42239605144391CCDCD8.webp)
--n_rows ([N_ROWS] rows in the grid (default: n_samples))
意味的には行数ですが、前述した--n_samplesと被るから詳細は不明。Default = n_samplesらしく、これは変更しなくても良いのでは?
python scripts/txt2img.py --prompt "a professional photograph of an astronaut riding a horse" --ckpt ./stable-diffusion-2-1/v2-1_768-ema-pruned.ckpt --config configs/stable-diffusion/v2-inference-v.yaml --H 768 --W 768 --n_rows 2
![--n_rows ([N_ROWS] rows in the grid (default: n_samples)) コマンド](https://takemi.blog/wp-content/uploads/2023/09/748DBFBC5AB04FC6A8765C12E5CD5DFB_E942F8654EA94109B601D8E43D05B36D.webp)
--scale ([SCALE] unconditional guidance scale: eps = eps(x, empty) + scale * (eps(x, cond) - eps(x, empty)))
全く分からない。書かれてる内容的には何らかの計算式で利用する値かな。値が変わることで生成される画像は変化してるので、かなり意味がありそう。
python scripts/txt2img.py --prompt "a professional photograph of an astronaut riding a horse" --ckpt ./stable-diffusion-2-1/v2-1_768-ema-pruned.ckpt --config configs/stable-diffusion/v2-inference-v.yaml --H 768 --W 768 --scale 2
![--scale ([SCALE] unconditional guidance scale: eps = eps(x, empty) + scale * (eps(x, cond) - eps(x, empty))) コマンド](https://takemi.blog/wp-content/uploads/2023/09/748DBFBC5AB04FC6A8765C12E5CD5DFB_695655B524174004BD6A1FF7599B3851.webp)
--from-file ([FROM_FILE] (if specified, load prompts from this file, separated by newlines))
File経由でpromptsを利用する場合に使うらしい。ぶっちゃけbat経由で良くないって思う。
--config ([CONFIG] path to config which constructs model)
学習モデルを構築する設定ファイルへのパスを指定する。
--ckpt (CKPT] path to checkpoint of model)
利用する学習モデルのパスを指定する。--promptの次くらいに大切だと思う。
--seed (SEED] the seed (for reproducible sampling))
生成画像にランダム性を与える数値。promptとseedが同じ値だと全く同じ画像が生成される。
なお、-1を指定すると、警告は出るが実質的な乱数として利用できる。
python scripts/txt2img.py --prompt "a professional photograph of an astronaut riding a horse" --ckpt ./stable-diffusion-2-1/v2-1_768-ema-pruned.ckpt --config configs/stable-diffusion/v2-inference-v.yaml --H 768 --W 768 --seed 1000
![--seed (SEED] the seed (for reproducible sampling)) コマンド](https://takemi.blog/wp-content/uploads/2023/09/748DBFBC5AB04FC6A8765C12E5CD5DFB_5D500E1972784DB2823BA6A6487BF6F5.webp)
--precision ({full,autocast} evaluate at this precision)
不明。値は--precision fullまたは--precision autocastのみ指定ができる。ただし、僕の環境だとfullはエラーで実行できなかった。
python scripts/txt2img.py --prompt "a professional photograph of an astronaut riding a horse" --ckpt ./stable-diffusion-2-1/v2-1_768-ema-pruned.ckpt --config configs/stable-diffusion/v2-inference-v.yaml --H 768 --W 768 --precision autocast
--repeat ([REPEAT] repeat each prompt in file this often)
promptをファイルで指定する場合の繰り返し設定だと思う。
![--repeat ([REPEAT] repeat each prompt in file this often) コマンド](https://takemi.blog/wp-content/uploads/2023/09/748DBFBC5AB04FC6A8765C12E5CD5DFB_205E1E6180E74F1DA462446C86230FDF.webp)
あとがき
ほとんど分かんなかったけど、学習メモってことで!
この記事は参考になりましたか?
コメント